Tanana Valley State Fair
Photography Division 22
Photographic Entry Mounting
Most any frame shop in Fairbanks and Ben Franklin’s in the North Pole Mall will dry mount your photo for a nominal fee. Be sure finished photo is the proper size – don’t expect the frame shop to know the rules. Heat shrinking the finished photo is good too – helps protect the exhibit from accidents during viewing.
To Mount Your Own Photographs:
1. General Information
2. Tools
3. Cutting and Mounting
4. Hints and Tips
1. General. Mounting pictures to foam core (a piece of foam with card stock on both sides) is both easy and economical. This is the way most professional photographers mount their pictures prior to sale. The foam backing gives the picture substance, helps prevent bending, and prepares the photo for matte or direct framing. Foam core can be found in many arts and craft store for under $3 a 20” x 30” sheet. Quarter inch (1/4”) or 3/8” is best and easiest to work. Thicker is fine if it’s all you can find.
- Hint: Pick sheets with no blemish marks. Dents and dings on the foam core surface will show through when the photo is mounted using spray adhesive.
Why Foam Core Dry Mounting: In previous Fairs photographs were required to be matte mounted. The average cost of materials to enter a photo was $7+ not including the investment of a matte cutter. The expensive matte was destroyed during the normal abuse of handling, display, and attaching tags. By transitioning to foam core in 2006 your average cost is $.55 per picture when preparing an exhibit yourself. Special tools no longer required – and you -the photographer - are no longer limited or forced to adjust your entry picture to fit a pre-cut matte format. Anything from 8x10 to 11x14 and all sizes in between are possible. After you get “the knack” of mounting pictures to foam core – you’ll probably do this to every photo you send to anyone, anywhere in the future.
2. Tools. The two basic tools are shown in Picture 1 – Exact-o knife and metal straight edge ruler. There is no shortage of expensive fancy tools –see Picture 2. These are useful when mounting several copies of the same picture and doing repetitive work. However, when these tools goof – the Exact-o knife and metal straight edge ruler are what you’ll use to fix it.
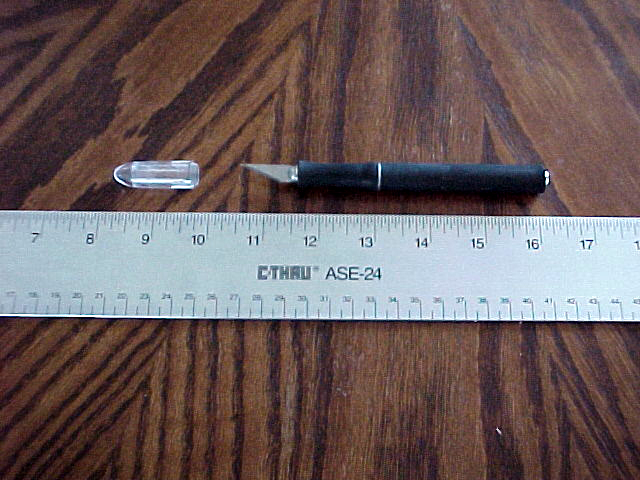
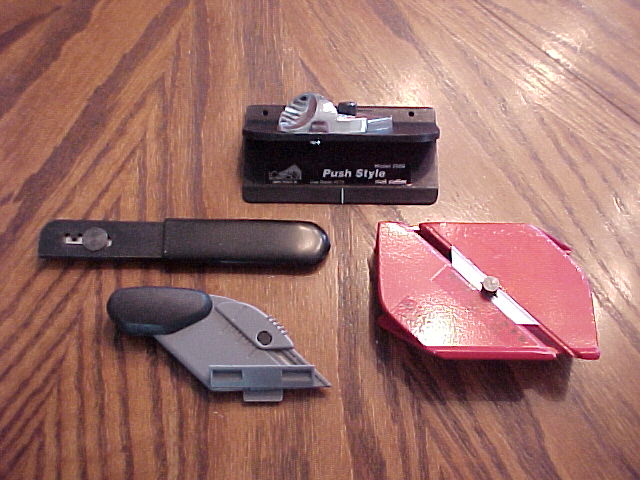
Photo spray adhesive can be found in both the scrap booking and photo section of crafts stores. At $16 a can expect it to last about 8 years. A Permanent adhesive is a must – otherwise your entry will fall apart in the summer heat. An alternate is permanent type framing tape – however even the thin adhesive layer can leave marks when the photo is pressed to the foam core. In the long run you’ll find the spray is more economical, much easier to use, holds better, and provides a more uniform coating.
3. Cutting and Mounting: Refer to page 7 of the Photography Division 22 Handbook or in the dimension at www.northpolegalley.com News section. Notice one thing in common with all examples – they each have a 3” of blank space on the left side. This blank area is where your exhibit tag, name sticker, and any ribbons will be attached. This 3” space must be clean, dry, and have no sticky surface. Your photo must be no smaller than 8x10 and no larger than 11 x 14. Any size in between is fine.
There are two ways to mount your photo. One is to pre-cut the foam and picture to an exact match before adhesion. Other is to glue the photo to a slightly larger piece of foam and trim both when dry. Pre cutting is good when you need the finished picture to be a specific size. Attaching and then cutting is good when doing allot of pictures at once and the finished dimensions are not critical. Only down side to cutting after adhesion is possible scratching of the photo.
· HINT: When cropping your photo or photo mounted on foam core – always keep a piece of paper under the metal ruler to prevent it from scuffing the photo.
Step 1.
· Find a clean, dry place to set up your equipment. You will need a piece of heavy cardboard or plywood to do your cutting on.
· START WITH A NEW SHARP BLADE IN YOUR KNIFE.

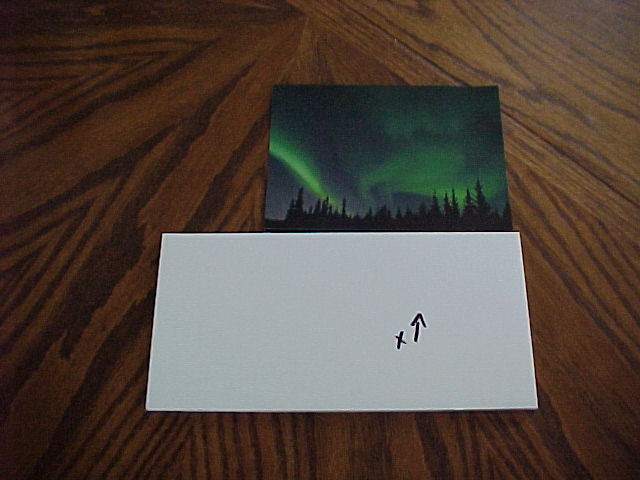
· Crop your finished picture to the proper size. (picture above)
· Select a scrape piece or cut new foam core slightly larger than the dimensions needed. (page 7) Select the best side – avoid dents, dings, and scratches that make groves in the surface when using spray adhesive.
· Place a mark at 3” from the left side. Using a felt tip marker – mark the area and UP side of the foam core to keep it properly oriented.
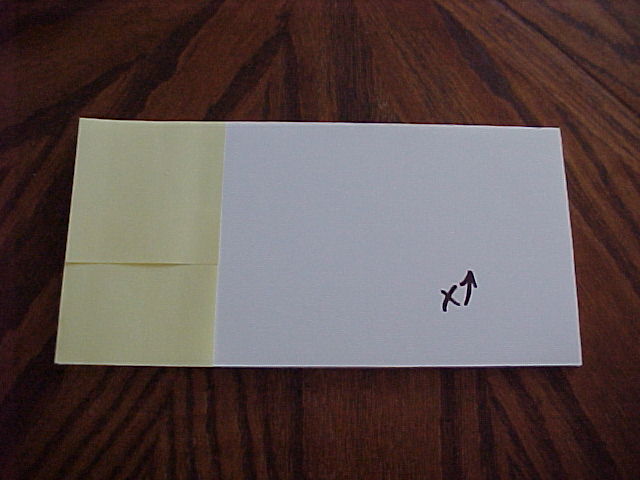
· Mask off the 3” area on the left side. This can easily be done using Post-It notes – they are generally 3” square – or masking tape applied with very little pressure.
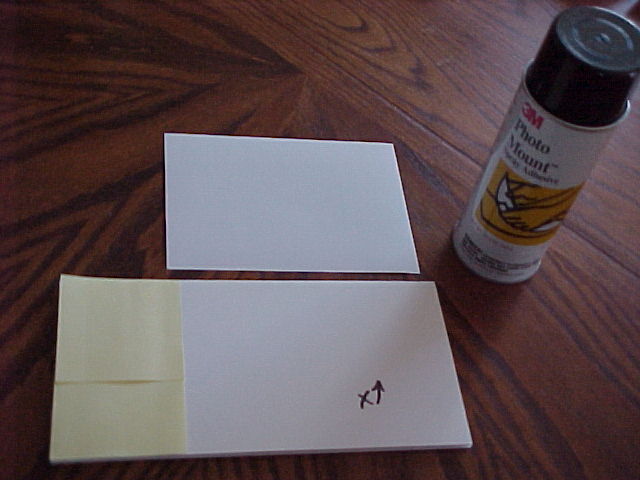
· Take the foam core outside and apply an even layer of adhesive spray to the foam core. Wait the amount of time the directions state – 60 seconds is normal – then carefully apply your photo. Start at one of the right side corners and slowly work your way across to the center leaving no bubbles.
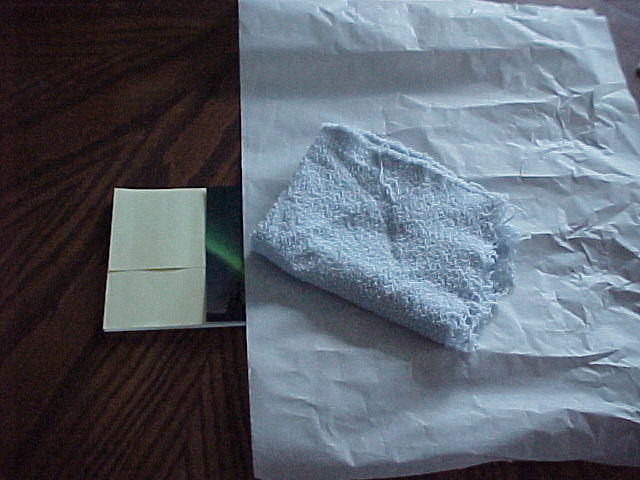
· Once seated to the foam core – put a piece of parchment paper over the photo and press the picture to the foam core using a small soft dry rag or towel.
· Verify the parchment paper isn’t stuck to your photo, replace the parchment paper and put a few heavy books on the picture for 2-6 hours.

· After the photo is attached to the foam core - remove the masking tape.
· If necessary, crop your photo to the size you want. Best to do this in two cuts. The first cut should penetrate the photo and first layer of the foam core card stock – your second cut should go through the rest of the exhibit. Do this to the three sides.
· Your finished exhibit should have 4 nice clean cuts and squared off corners and resemble something like the above photo.

· The three inch margin on the side is used for display of the exhibit tag and ribbons (as above). After pick-up day the photo can be framed or shadow boxed as-is ribbons and all - makes a great keep sake. The margin can also be cropped off to leave a finished photo.
HINT – it’s pretty rare but if you have any small sticky spots - carefully apply just enough talc, baby powder or mica powder to absorb the sticky area. All excess powder must be removed or it will spread across your exhibit.
4. Hints and Tips.
· Do Not use foam core with heavy marks or nicks on the surface
· One side of the foam core is usually whiter than the other. Pick the whiter of the two.
· Do Not use re-position able spray or adhesive. Always use permanent.
· Avoid using framing tape. It may not hold your exhibit together and the thin adhesive layer can leave marks when pressed.
· Start with a new sharp blade.
· Don’t wait until the last minute.
· Consider dropping your photo’s off at a framing shop or Ben Franklin’s in the North Pole Mall and have your exhibits shrink wrapped. This will help protect your exhibit during viewing.
Good luck!
Kevin
|